

Table of Contents
ToggleScrewing in a light bulb doesn’t require an electrician, and now, neither does adding a security camera to your home. Light socket security cameras disguise themselves as ordinary LED bulbs while recording everything from package thieves to midnight raccoons. They drop into existing fixtures, connect to your Wi-Fi, and start monitoring in minutes. No drilling through siding, no running low-voltage cable through your attic, and no contractor invoices. For homeowners looking to boost security without a major installation project, these hybrid devices offer a practical middle ground between traditional hardwired cameras and battery-powered models that need constant recharging.
Key Takeaways
- Light bulb security cameras combine functioning LED bulbs with built-in motion detection and two-way audio, installing into standard sockets in under 10 minutes without any new wiring.
- These cameras eliminate installation costs and complexity compared to hardwired systems, making them ideal for renters, older homes, and properties where drilling or wall modifications aren’t feasible.
- Key features to prioritize include at least 1080p resolution, 110–130° field of view, weather resistance (IP65/IP66 rating for outdoor use), and local microSD storage or cloud backup options.
- Proper placement at front porches, garages, and driveways within 8–12 feet of entry points maximizes facial recognition and deters package theft while maintaining clear coverage.
- Security light bulb cameras require continuous power from the existing circuit and typically operate on 2.4 GHz Wi-Fi with a practical 50–100 foot range through walls, so test connectivity before final installation.
- Always turn off power at the breaker, use a voltage tester before handling, and respect privacy laws by avoiding windows or neighbors’ property when positioning your camera.
What Is a Light Bulb Security Camera?
A lightbulb security camera combines a functional LED bulb with a built-in camera, motion sensor, and often a speaker/microphone for two-way audio. The camera module sits at the base or dome of the bulb, pointing downward or outward depending on the design. Most units screw into standard E26 or E27 sockets, the same threading as your typical household bulb.
The LED portion operates like any other bulb, controlled via app or built-in light sensor. The camera streams video to your phone over Wi-Fi, stores footage on a microSD card or cloud service, and sends motion alerts when activity is detected. Some models include full-color night vision using ambient light from the bulb itself, eliminating the washed-out infrared look.
These aren’t substitutes for whole-home security systems, but they fill gaps where running new wiring isn’t feasible, porches, detached garages, carports, or rental properties where permanent modifications aren’t allowed. The bulb format makes them nearly invisible to anyone not specifically looking for a camera.
Key Benefits of Installing a Light Bulb Security Camera
Zero New Wiring
If you’ve got a working light socket, you’ve got power and a mounting point. No need to fish cable through walls or hire an electrician to install a dedicated circuit. This makes them ideal for older homes where opening walls means dealing with plaster, lath, and probable asbestos.
Faster Installation Than Traditional Cameras
Typical install time: under 10 minutes. Shut off the breaker, remove the old bulb, screw in the new one, restore power, download the app, and connect to Wi-Fi. Compare that to mounting a wired camera, drilling through brick or vinyl, sealing penetrations, and configuring a DVR.
Dual-Purpose Functionality
You’re not sacrificing light for security. The bulb still illuminates your space, often with adjustable brightness and color temperature. Some models let you schedule lighting independently from camera functions, so the bulb turns on at dusk even if you’re not actively monitoring.
Deterrent Value
A visible camera, even one that looks like a bulb, can discourage opportunistic theft. Pair it with motion-activated lighting, and you’ve got a setup that both records and startles intruders.
Portability
Unlike hardwired systems, you can unscrew a light socket security camera and take it with you when you move. That’s a real advantage for renters or anyone planning to sell.
How Light Bulb Security Cameras Work
Power comes from the existing light circuit. When you flip the wall switch or restore power at the breaker, the bulb draws current to run both the LED and the camera electronics. Most units require the switch to remain on for continuous recording: if someone cuts power, the camera goes offline unless it has a built-in battery backup (rare in this category).
The camera connects to your home Wi-Fi network during initial setup. You’ll use a companion app (iOS/Android) to scan a QR code or enter network credentials. Once connected, the camera streams live video and uploads recorded clips triggered by motion detection.
Storage options typically include:
- MicroSD card (user-supplied, usually up to 128 GB) for local storage
- Cloud subscription for remote backup and longer retention
- No storage, live-view only (least common)
Motion detection uses PIR sensors (passive infrared) or pixel-based software analysis. When movement is detected, the camera records a clip, sends a push notification, and may trigger the light or an audible siren. Sensitivity adjustments help reduce false alerts from swaying branches or passing cars.
Two-way audio works through a built-in speaker and mic. You can talk to delivery drivers, warn off trespassers, or tell the dog to stop barking, all from your phone. Audio quality varies: expect smartphone-level clarity, not intercom-grade performance.
Essential Features to Look for When Choosing Your Camera
Resolution and Field of View
Look for at least 1080p (Full HD). Some newer models offer 2K or higher, which helps with facial recognition and license plate details. A 110–130° field of view covers most doorways and driveways without fisheye distortion.
Night Vision Type
- Infrared (IR): Black-and-white footage, effective in total darkness up to 30–50 feet
- Full-color night vision: Uses the LED bulb’s light for color footage, but requires the light to stay on
- Hybrid modes: Switch automatically based on ambient light
Motion Detection Zones
Better models let you define active zones in the app, areas where motion triggers recording. This prevents alerts every time a car drives past on the street.
Weather Resistance
If installing outdoors, confirm an IP65 or IP66 rating. That means dust-tight and protected against water jets. Check whether the fixture itself is rated for wet locations: some bulbs are weatherproof, but the socket may not be.
App Quality and Compatibility
Read reviews on app stability. Cameras with buggy apps or slow cloud servers turn into expensive paperweights. Make sure the app supports multiple users if you want family members to access feeds.
Power Loss Behavior
Some cameras resume recording automatically after a power outage. Others require manual reactivation or app intervention, critical if you’re away during a storm.
Local vs. Cloud Storage
Local microSD storage avoids monthly fees but risks losing footage if someone steals the bulb. Cloud storage costs $3–10/month but keeps recordings safe offsite. Modern smart home devices increasingly balance both options.
Step-by-Step Installation Guide for DIY Homeowners
Tools and Materials Needed:
- Light bulb security camera
- MicroSD card (if using local storage)
- Smartphone with Wi-Fi access
- Stepladder (for ceiling or high-mounted fixtures)
- Voltage tester (optional but recommended)
Safety First:
Always turn off power at the breaker, not just the wall switch. A switch in the wrong position can leave the circuit live. Use a non-contact voltage tester to confirm the socket is dead before touching any metal parts.
Installation Steps:
- Cut power at the breaker panel. Identify the correct breaker by flipping switches until the fixture goes dark, or label circuits beforehand.
- Remove the old bulb. Let it cool if it was recently on. Dispose of CFLs properly at a hardware store recycling center.
- Insert the microSD card (if applicable) into the slot on the camera bulb before installing. Once it’s screwed in overhead, you won’t want to climb back up.
- Screw in the light socket security camera. Turn clockwise until snug, don’t overtighten or you’ll crack the base. Ensure the camera lens points toward your coverage area.
- Restore power at the breaker. The bulb should light up and the camera will boot (usually indicated by a status LED or chime).
- Download the manufacturer’s app from the App Store or Google Play. Create an account if required.
- Add the camera via the app. This typically involves scanning a QR code on the bulb or packaging, then entering your Wi-Fi password. Use the 2.4 GHz band, most bulb cameras don’t support 5 GHz.
- Adjust settings: Set motion zones, sensitivity, recording schedule, and notification preferences. Test the two-way audio and night vision modes.
- Secure the app with a strong password and enable two-factor authentication if available.
Troubleshooting:
- Camera won’t connect to Wi-Fi: Move your router closer temporarily, or use a Wi-Fi extender. Thick walls and metal fixtures can block signals.
- Bulb doesn’t light up: Check the breaker, test the socket with a known-good bulb, and verify the camera’s power requirements match your circuit (most are 110–120V).
- Frequent false alerts: Narrow motion zones, reduce sensitivity, or reposition the bulb away from high-traffic areas like busy streets.
No permits are required for installing a light bulb camera, you’re replacing a bulb, not altering electrical infrastructure. But, respect privacy laws: don’t aim cameras at neighbors’ windows or property lines where they have a reasonable expectation of privacy.
Best Placement Locations Around Your Home
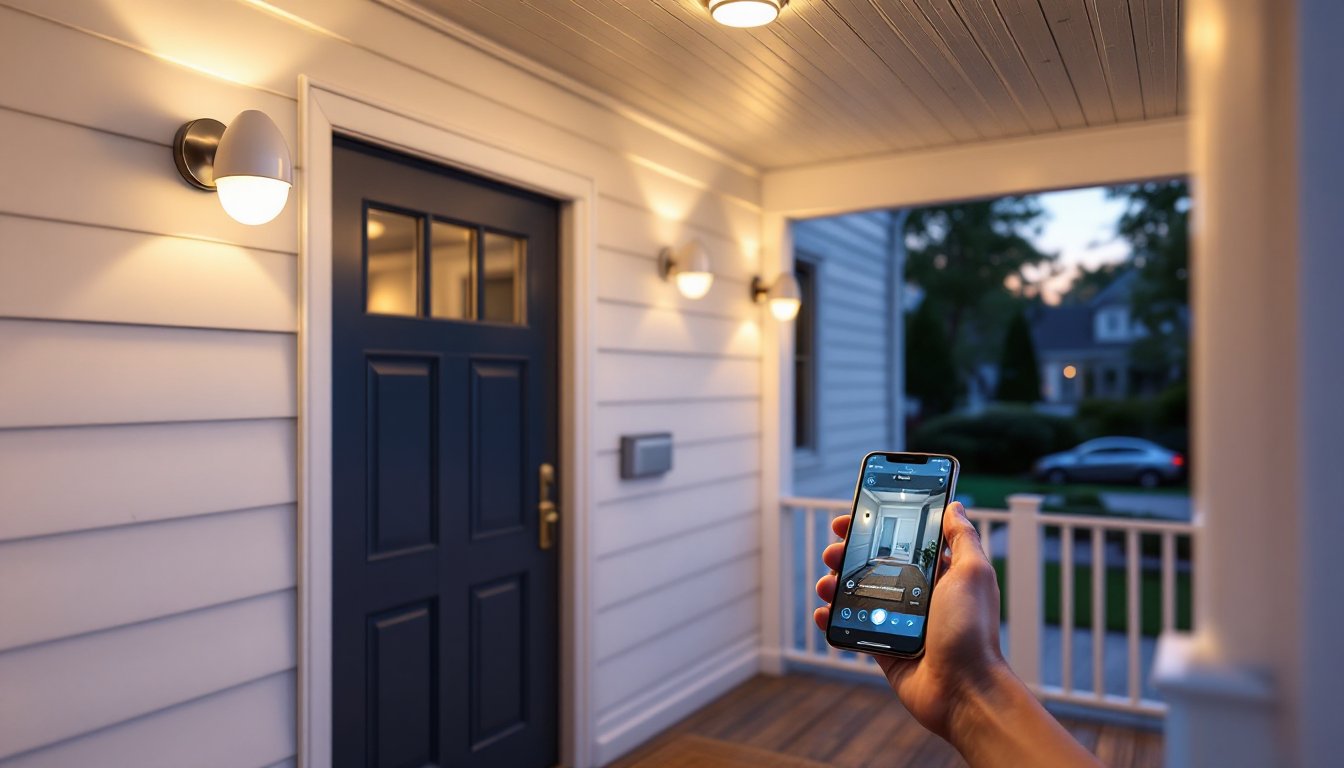
Front Porch or Entryway
The most common spot. Covers package deliveries, visitor identification, and porch pirate deterrence. Mount in the fixture nearest the door, ideally within 8–12 feet for clear facial details. Many homeowners report significant savings when they avoid security installation costs by using camera light bulbs instead of hiring professionals.
Garage or Carport
Monitor vehicle access, tool storage, and side entry doors. Garages often have exposed sockets on ceiling fixtures or wall sconces. Bonus: the light helps you see when unloading groceries at night.
Backyard Patio or Deck
Watch for trespassers, monitor kids or pets, and keep an eye on grills or outdoor furniture. Use a weatherproof model and ensure the fixture is rated for damp or wet locations per the National Electrical Code (NEC) Article 410.
Detached Outbuildings
Sheds, workshops, or pool houses with electrical service can host a bulb camera. Wi-Fi range may be an issue, test signal strength or add a mesh node.
Driveways and Walkways
Floodlight fixtures or lamppost sockets work well. Aim to capture approach angles rather than straight-down views. A 10–12 foot mounting height balances coverage and detail.
Basement or Utility Room Entries
Interior use is fine, though you’re giving up the lighting benefit if the area is rarely occupied. Useful for monitoring mechanical systems or secondary access points.
Avoid:
- Bathrooms and bedrooms (obvious privacy issues)
- Tight, enclosed fixtures where heat buildup exceeds the bulb’s thermal rating
- High-traffic indoor areas where the camera triggers constantly, draining storage and battery on your phone with notifications
- Beyond Wi-Fi range, most bulb cameras operate on 2.4 GHz with a practical range of 50–100 feet through walls
For optimal coverage, sketch your property and identify blind spots where traditional cameras are hard to mount. Light bulb models shine (literally) when you need coverage but lack convenient mounting surfaces or power sources.
Conclusion
Light bulb security cameras won’t replace a full NVR system with hardwired cameras, but they solve real problems for DIYers who want security without demolition or contractor bills. They’re especially effective for renters, anyone upgrading in stages, or filling gaps around detached structures. Spend a few minutes reading specifications, match the bulb to your fixture’s rating, and you’ll have eyes on your property before the sun sets.