
Table of Contents
ToggleA white kitchen island doesn’t just add function, it anchors the room, increases storage, and gives you a reason to linger over coffee instead of rushing through prep. Whether you’re sketching out a full remodel or looking to refresh what you’ve already got, a white island works with almost any cabinet color, countertop material, or floor finish. It brightens dark kitchens, balances busy backsplashes, and scales from compact condo layouts to sprawling open-concept plans. This guide walks through the styles, dimensions, materials, and practical details you need to choose, install, or build the right white kitchen island for your space.
Key Takeaways
- A white kitchen island brightens dark kitchens, increases storage, and works with nearly any cabinet color, countertop material, or floor finish while remaining timeless across design trends.
- Proper spacing is critical: maintain at least 42 inches of clearance between the island and surrounding cabinets, with functional islands starting at 24×48 inches minimum and scaled to roughly one-quarter to one-third of your kitchen’s footprint.
- Choose durable materials like cabinet-grade plywood (3/4-inch), semi-gloss or satin cabinet-specific paint (Benjamin Moore Advance or Sherwin-Williams ProClassic), and countertops such as quartz, butcher block, or solid surface to ensure your white island withstands daily use.
- Design contrast by pairing your white island with darker perimeter cabinets (navy, charcoal, or walnut), adding wood accents like butcher block tops, and incorporating thoughtful lighting with pendant fixtures spaced 30–36 inches above the countertop.
- White surfaces require minimal daily maintenance—simply wipe with a damp microfiber cloth and mild dish soap—and avoid bleach-based cleaners that can yellow the paint over time.
- Consider functional details like full-extension drawer slides, waterfall edges for a modern aesthetic, integrated pulls or push-to-open latches, and open shelving with baskets to maximize storage and usability.
Why White Kitchen Islands Remain a Timeless Choice
White reflects light, which matters when you’re working with overhead cans, pendants, or a single window over the sink. A white island makes small kitchens feel larger and dark kitchens feel less cave-like. It also stays neutral as trends shift, pair it with stainless appliances now, swap in matte black hardware later, and it still works.
Unlike bold color islands that date quickly, white blends with most cabinetry finishes: gray shaker, walnut slab, two-tone painted, or beadboard. A white kitchen with wood island accents (butcher block or reclaimed planks on the waterfall edge) adds warmth without clashing. Similarly, a modern white kitchen island with flat-panel doors and integrated pulls fits contemporary builds, while a raised-panel version suits traditional or transitional styles.
White also hides less than you’d think. Semigloss or satin paint finishes resist smudges better than flat, and quartz or solid-surface countertops in white or light gray won’t show water spots the way darker stone does. The key is choosing durable materials and finishes upfront, not avoiding white altogether.
Popular White Kitchen Island Styles for 2026
Current trends lean toward mixed materials and flexible layouts. Here’s what’s showing up in new builds and remodels:
Modern white kitchen with wood island tops: Pair painted base cabinets (Benjamin Moore Simply White or Sherwin-Williams Pure White) with a butcher block or live-edge walnut countertop. The contrast adds texture without sacrificing the bright, airy feel. Seal the wood with food-safe mineral oil or a water-based polyurethane (three coats minimum) to prevent staining.
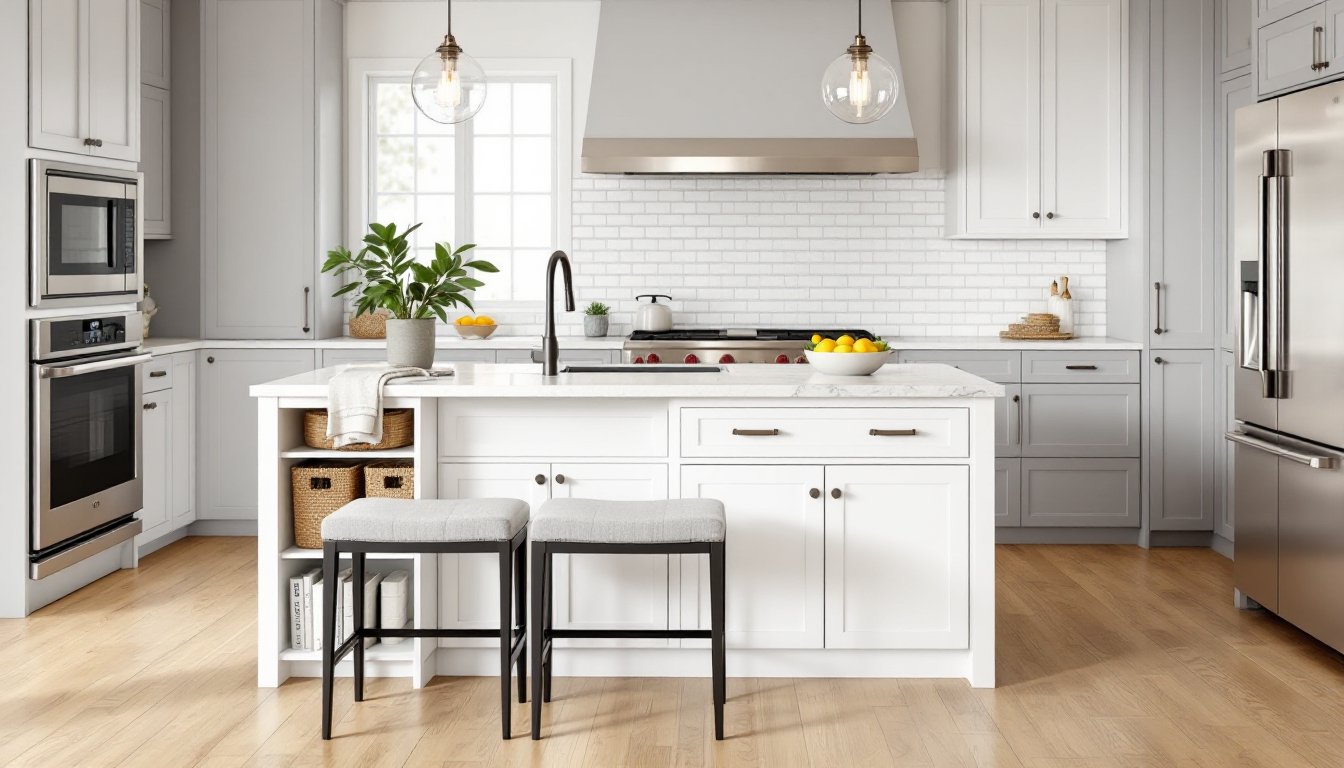
White kitchen island with seating: Extend the countertop 12–15 inches beyond the cabinet base to create an overhang for stools. Standard counter height is 36 inches: pair it with 24-inch-seat-height stools. If you go with a 42-inch bar-height island, use 30-inch stools and leave 10–12 inches of knee clearance underneath. Plan 24 inches of width per person for comfortable seating.
White kitchen island on wheels: Mobile islands work in rentals or tight layouts where a fixed island blocks traffic. Look for locking casters rated for at least 200 pounds and a solid-wood or plywood core (not particleboard, which sags). These typically max out at 24×36 inches, enough for prep space and a utensil drawer, but not for plumbing or electric.
Shaker-style with open shelving: Replace lower cabinet doors on one side with open shelves for cookbooks, baskets, or everyday dishes. Use 3/4-inch plywood for shelves and space them 10–12 inches apart. Paint the interior the same white as the exterior or add a pop of color (sage, navy, or charcoal) for subtle contrast.
For builders comfortable with tools, a DIY white kitchen island project can save hundreds over prefab options and allows custom sizing.
Choosing the Right Size and Layout for Your Space
Island sizing isn’t arbitrary, it’s dictated by traffic flow, appliance clearances, and local building codes. Start with these baselines:
• Clearance: Maintain at least 42 inches between the island and surrounding cabinets or appliances. If your kitchen sees two cooks at once, bump that to 48 inches. Less than 36 inches creates bottlenecks and makes it hard to open oven or dishwasher doors fully.
• Minimum island size: A functional island starts around 24×48 inches. Anything smaller just gets in the way. If you’re adding a cooktop or sink, plan for at least 36×60 inches to accommodate plumbing runs, electrical circuits, and code-required landing space (9 inches on one side of a cooktop, 18 inches on the other per IRC).
• Proportion: In a 10×12-foot kitchen, a 4×8-foot island overwhelms the room. Aim for an island that’s roughly one-quarter to one-third the footprint of the kitchen floor.
Layout considerations:
L-shaped or galley kitchens: Position the island parallel to the longest run of cabinets, leaving access to the refrigerator and range unobstructed.
Open-concept spaces: Use the island to define the kitchen zone without blocking sightlines to the living or dining area. A white island kitchen design with a waterfall edge on the living-room side visually anchors the space.
Plumbing and electrical: Running a drain line through a concrete slab is expensive and disruptive. If your island will include a prep sink or dishwasher, confirm that your floor joists or slab allow for drainage slope (minimum 1/4 inch per foot). Electrical outlets on islands must be GFCI-protected and positioned so cords don’t drape over the countertop (NEC 210.52(C)(2)).
Material and Finish Options for White Islands
Cabinet boxes:
Plywood: Stronger and more moisture-resistant than particleboard or MDF. Use 3/4-inch cabinet-grade plywood (birch or maple veneer) for the box and 1/2-inch for the back panel. Expect to pay 20–30% more than particleboard, but it won’t sag or swell if a pipe leaks.
MDF with paint-grade finish: Medium-density fiberboard takes paint beautifully, no grain to fill, no knots. It’s heavier than plywood and less forgiving if it gets wet, so seal all edges with primer before painting.
Cabinet doors:
Shaker: Five-piece construction (four-piece frame, center panel). Timeless, easy to clean, works in traditional or modern kitchens.
Flat-panel (slab): Single piece, no frame. Gives a sleek, contemporary look. Use 3/4-inch MDF or plywood: anything thinner looks cheap.
Beadboard or raised panel: Adds detail and texture. More surface area means more painting and touch-ups down the road.
Paint:
Use a waterborne alkyd or 100% acrylic enamel formulated for cabinets (Benjamin Moore Advance, Sherwin-Williams ProClassic). These level better than standard wall paint and cure harder. Apply a stain-blocking primer (BIN or Cover Stain) first, especially over raw wood or MDF, then two finish coats. Lightly sand between coats with 220-grit paper.
Countertop:
Quartz: Nonporous, no sealing required, available in white with subtle veining (Caesarstone Statuario Nuvo, Cambria Torquay). Expect $60–$100 per square foot installed, depending on edge profile and region.
Butcher block: Warm, repairable, and affordable ($40–$70 per square foot). Requires monthly oiling or a polyurethane topcoat. Avoid placing it directly over a dishwasher, heat and moisture cause warping.
Laminate: Budget-friendly ($20–$40 per square foot), available in white or marble-look patterns. Seams show, and it scratches more easily than stone, but it’s DIY-friendly if you’re using a router and contact cement.
Solid surface (Corian): Seams are nearly invisible, and minor scratches can be sanded out. Mid-range pricing, around $50–$80 per square foot.
Many kitchen design ideas emphasize mixing countertop materials, stone on the perimeter, wood on the island, for visual interest and practical zoning.
Design Tips to Maximize Your White Island’s Impact
Contrast with cabinetry: A white kitchen with island in a darker finish (navy, charcoal, or walnut-stained wood) creates a focal point and prevents the room from feeling washed out. Conversely, if your perimeter cabinets are dark, a white island lightens the space and draws the eye to the center.
Hardware: Brushed nickel, matte black, or unlacquered brass handles add dimension to flat white doors. For a modern white kitchen island, consider integrated pulls (routed grooves along the top edge of doors) or push-to-open latches to eliminate hardware altogether.
Lighting: Hang pendant lights 30–36 inches above the countertop, spaced evenly if you’re using multiples. Choose fixtures that complement the style, glass globes for transitional, drum shades for modern, lanterns for farmhouse. Dim them on a separate circuit from your overhead recessed lights for task vs. ambient control.
Storage details: Add pull-out trash and recycling bins, a drawer with built-in spice inserts, or a shallow drawer for baking sheets. Use full-extension drawer slides rated for 100 pounds (Blum Tandem or similar) so you can access the back without kneeling. If you’re incorporating open shelving, galleries featuring white islands often show woven baskets or ceramic crocks to keep clutter contained.
Waterfall edges: Extend the countertop material down one or both ends of the island for a clean, modern look. This works especially well with book-matched quartz or marble slabs. The miter joint where the horizontal and vertical pieces meet must be tight, any gap wider than 1/16 inch will catch dirt and show.
Toe kick: Paint or tile the toe kick (the recessed space at the base) to match the island, or install a contrasting wood plank for a furniture-style detail. Standard toe kick height is 4 inches, depth 3 inches.
Maintenance and Care for White Kitchen Islands
White surfaces show dirt, but they’re also easier to clean than dark finishes, which show every fingerprint and water spot.
Daily cleaning:
Wipe painted surfaces with a damp microfiber cloth and a drop of dish soap. Avoid abrasive sponges or cleaners with bleach, which can yellow white paint over time. For stubborn grease, use a degreaser formulated for kitchen cabinets (Krud Kutter, Simple Green), then rinse and dry.
Protecting the finish:
Use cutting boards, trivets, and coasters. Even quartz can scorch or discolor from hot pans placed directly on the surface. If your island has a butcher block top, reapply mineral oil or beeswax every 4–6 weeks, or more often if the wood looks dry.
Touch-ups:
Keep leftover paint for dings and scuffs. Clean the damaged area, lightly sand with 220-grit paper, then dab paint with a small artist’s brush. Feather the edges so the repair blends. For deeper gouges in wood or MDF, fill with spackling compound, let dry, sand flush, prime, and paint.
Grout and caulk (if applicable):
If your island has a tile backsplash or sits on a tile floor, use epoxy grout instead of traditional cement grout, it resists staining and doesn’t require sealing. Recaulk the seam between the countertop and backsplash every 1–2 years with a color-matched silicone caulk to prevent water intrusion.
Hardware:
Tighten screws on handles and hinges quarterly. Loose hardware accelerates wear on both the door and the cabinet box. If a hinge becomes stripped, fill the hole with a wooden golf tee or toothpicks dipped in wood glue, let cure, then re-drill the pilot hole.
Conclusion
A white island fits nearly any kitchen style, budget, and skill level, from a mobile cart on casters to a built-in centerpiece with seating and storage. Focus on clearances, durable materials, and the details that make daily use smoother: full-extension slides, proper lighting, and finishes that stand up to spills and scrapes. With careful planning and honest prep work, a white kitchen island becomes the most-used, most-loved feature in the room.